Ok James, Michael, Elliot, Tobias, Coran, Ferdie and Connor it’s time to bring our Laser tag game closer to the fun bit – ie get started. I have read through a lot of examples of Arduino based Laser Tag systems and this tutorial by IBM will be a good place to start. It makes a gun that can shoot a “Data Bullet” to a second gun and have it record being hit, display who just shot them (player 0,1,2,3) and depending on one of four types of ammo (0,1,2,3), reduce your health till the darkness of doom envelopes your body end death is a welcome resease – ok the “I’m dead” LED lights up.
The “Data Bullet” is (in this simple example) a 1 byte (8 bit) message encoded on the IR pulse that is sent when you shoot. The data sent is based on the open source Laser Tag standard Miles Tag protocol.
Please read through these 3 parts to get a good idea of whats happening. Skim Parts 1 and 2, Part 3 is the good stuff.
IBM DuinoTag Tutorial Part 2 – Build and test the receiver part of the ‘Duino Tag gun, including the testing.
IBM DuinoTag Tutorial Part 3 – Build the transmitter and complete the “DuinoTag” gun.
Here is the prototype made up on protoboard showing the Arduino underneath, IR receiver, IR LED, red hit led, push button for trigger and resistors for leds and switch. Also shown is an example of a hacked toy gun. Perhaps you can use an old NERF gun?


Link to the Arduino code download from Part 3
Part 3 has a good description of what the code is doing for those who want to understand or modify it to do extra things – like add sounds from the WTV020 module perhaps? Handle different ammo types. Be able to heal another player. Modify the “Data Bullets” to include teams and much more.
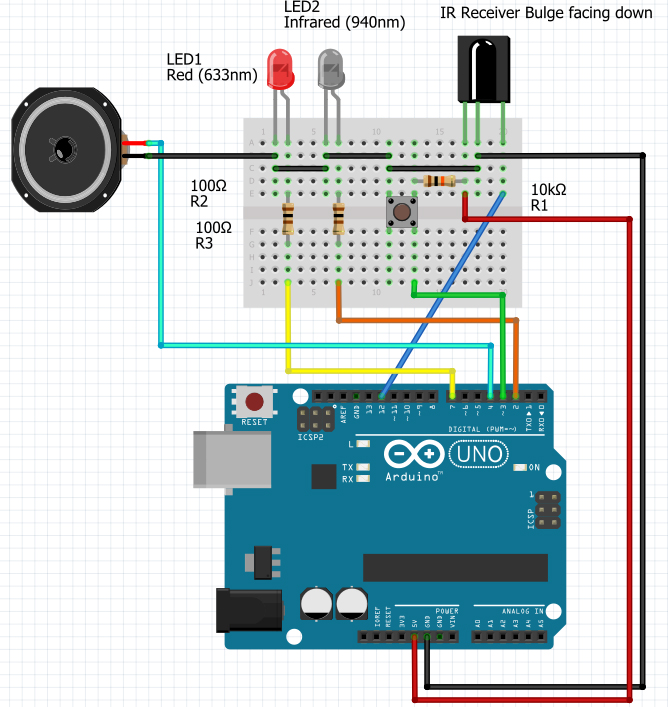
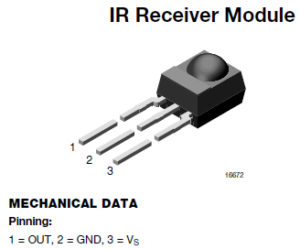
Here is the circuit to make up on your Arduino breadboard and the pins for the VISHAY TSSP4338 module (Vss is the power supplyy 5V connection).